We played the "River Battle" Scenario on a 120x120cm table with quite little terrain just to get going.
OOB(as I remeber it...)
Welsh
1x Foot Companions with leader @ 5 points
4x Foot Warriors @ 3 points each
2x Noble Riders @ 5 points each
1x Mounted Skirmisher @ 2 points
2x Foot Skirmishers @ 1 point each
1 Extra Leadership Point @ 2 points
Total @ 32 Points
Romano-British
1x Mounted Companions with leader @ 5 points
2x Noble Riders @ 5 points each
3x Ordinary Shieldwall @ 3 points each
2x Ordinary Warriors @ 3 points each (Saxon Mercenarys)
1 Extra Leadership Point @ 2 points
Here follows some pictures from the game and a few comments about the action:)
We decided to have 2 fords along the river, the main one by the road and one further up the river about where the sheeps flook are. All the river could be forded at all it´s lenght but the 2 fords made it all much easier.
Welsh warriors lined up to deffend the fors, the Leaders and his Companions have hiden behind the levys...
The second part of the Welsh force had lined up near the other ford, this contingent was made up of the Welsh Noble Riders an all the skirmishers.
The Romano-British force had gathered all there soldiers along the road to the ford, the Warlord let the Saxon mercenarys lead the attack...
It all broke loose with a race for the fords...
The Welsh sent their Mounted Skirmishers away to the main ford ar the Noble Raiders and Foot skirmishers hurried for the secondary ford.
The British comander sent just one group of Noble Raiders against the secondary ford to protect it and stop the Welsh force to cross it to easy... the rest of the British soldiers ruched to the main ford just to arrive as the Welsh men did...
Note: the read shield markers we used as Leadership Points.
Stalemate ar the ford...
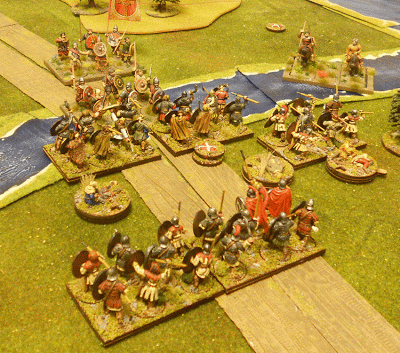
The Welsh Warriors chose to cross the river and attack the less numerous Saxon Mercenarys as the British shieldwall cheer...
By the secondary fort the British have reinforece with a second group of Noble Raiders...
The Welsh skirmishers start to work there way around the british flank...
By the main fort the battle continues and raiging forward and back... to support the Saxon Mercenary one British shieldwall unit have also joined the fight...
Attrition start to build up... Which unit will breake first and give way for the enemys...
The Welsh center warrior unit have had enought and loose their heart, leaving the Welsh battle line very vulnerable...
The British don´t manage to exploit the weaknes in the Welsh battle line, instead they send in reinforcements from the reserve, but still sits the Welsh warlord back and let his followers do the fighting...
It have been a long fight and one after another the initial Welsh warrior units have had enought and flees the river, the Saxon mercenarys have well earned their pay...
Now the welsh leader with his companions stumble in to the river to join the fight and turn the tide...
The Welsh leader with the last of the Welsh warriors manage to get rid of one of the Saxon unist as well as the British shieldwall unit...
Even so the Welsh leader choose to retreate with his remaining forces to fight another day...
...might be that Jonas are of another opinion;)
We had a nice time playing Bux Bellorum again, unfortunally we had forgot lots of rules, so it was quite some looking up in the rulebook.
We liked the game so much that we decided to play this small scenario using the same forces BUT using the Hail Caesar rules and also once using the Dux Britanniarun rules to see how the different game systems difference in game outcome.


