Showing posts with label AAR. Show all posts

Sunday, April 14, 2024

Age of Penda

Planning on puting my Romano-British and Saxon minis up for sale as I dont use them much. Painted them some 15-years ago and they been through some tought battles, last one back in 2018 if I recall right. 

So I thougt they would see one last outing trying my matey Dan Mersays "Age of Penda" rules publiched by Wingalf Miniatures. I have been involved in playtesting the system but in the 100-year war version "Arrowstorm" so the Dark Age one are new to me. I like Dan´s Dux Bellorum rules set  during the same era of history very much so I have good hopes for Age of Penda to.


I just got the .PDF of the rules so cant say much about the printed book  The Rulebook as well as the .PDF can be ordered at WargameVault. The rules are 32-pages in an easy to read layout with out any pictures. 

To play you will need 2 armies of 6-15 units (basing or scale dosent realy matter so need for re-basing etc.), some 6-sided dice, 6-10 tacktical tokens that are markers to use on the Tactics Chart (picture abowe) that is one of the main elements of these rules.

You will also need a offset gridded battle fileld that are 5 rows with 5 or 4 squares in each row, a total of 23 squares. I used some markers to show the gridd. Might say im a bit dubious about the gridds, it makes the moving easy but i dont think the game look as good as without.

Each army are made up of a quite narrow amount of troop types, just 4 of them, Mounte Warriors, Armoured Warriors, Unarmourd Warriors and Skirmishers (only unit type that can shoot). one of the units have the Leader includend.
Each unit type has a cost you pay to recruite them in your force.

Despite the low number of different troop types I feel that it is enought to represent a large amout of different dark age armies, Dan has included 4 sample armies in the rules, all with different compossition and tactical chalanges.

Each turn the players start to place their Tactical Tokens on the Tactics Chart when all tactic tokens has been places the player alternate to perform the actions choosen from the tactical chart. Most of the actions activate all unit in a square, you can have no more than 3 units in a square at any time.

there are a bunch of basic actions like Shoot, Rally, Move, Battle but also 8 special actions that gives you the opportunety to get the best out of your units, like get your Warriors to throw javelins etc. 

All in all I like the "Age of Penda" rules, they give me fun, fast and managable dark age games, all I need:)


Wont give you a blow by blow AAR but can say that the Saxons managed to win it all, mostly due to poor dice rolling in the combat between the Romano-British Mounted Warriors and the Saxon Unarmoured Warrios with Skirmish support. below a bunch of pictures from our game, the warband composition and lastly a picture of the victorius Saxon taking the spoils of war.

Romano-British warband was composed of 3 Mounted Warriors  (one with the Leader), 2 Armoured Warriors, 3 Unarmoured Warriors and 2 Skirmisers.

The Saxons fielded 1 Mounted Warriors, 3 Armoured Warriors (one with the Leader), 5 Unarmoured Warriors and 2 Skirmishers.


Wednesday, January 5, 2022

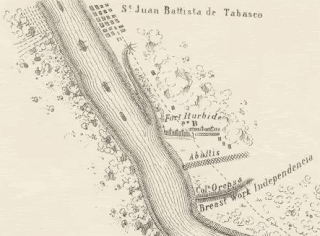
Second Battle of Tabasco


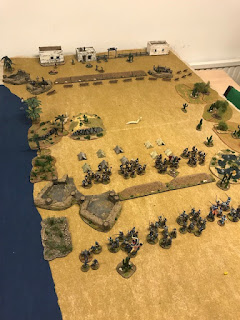
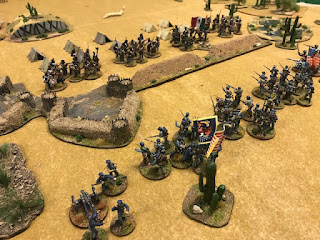
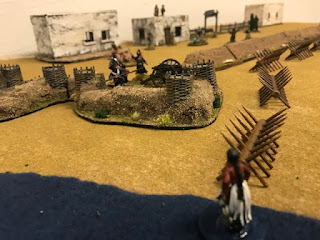
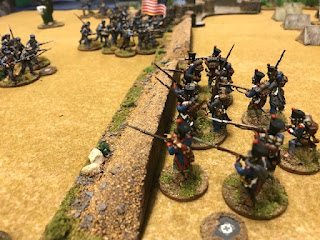
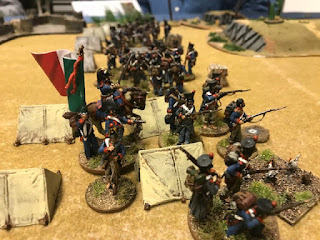
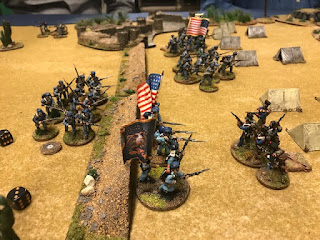
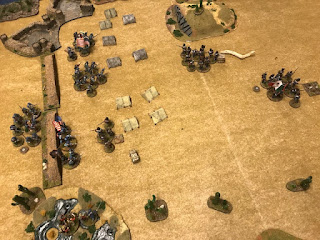
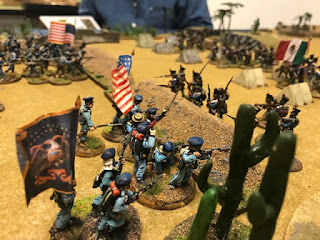
Found some pictures from our Mexican-American war game "Second Battle of Tabasco" that I run at the club a couple of month ago using the Rebels and Patriot rules published by Osprey.

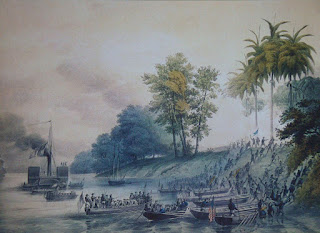
The battle was fought 15-16 June 1847, the American was advancing along Tabasco river in steamboats to capture the city of San Juan Bautista (presentday Villahermosa). 

The Mexican had blocked the river and set up fieldworks to protect the blocades. Our game focused on the land attack made on the morning 16 June 1847 by the American forces leader Commodore Perry and some 1000 men with the objective to cleare the field works and caprutre the city. The fieldworks was defended by Colonel Hidalgo and his 600 men that had to leave their breakfast uneaten to take up the fight. 

Historacly the Americans on the steamers managed to get pass the blocade and capture the city before Commodore Perry managed to arrive there on foot.

Below you can see some pictures from our game, we run it as the Scenario "Retreat to the Sunken Road" from the rules, there the Mexican had leave their breakfast and retreat back from the fieldworks to Fort Iturbide just outside the City, it all ended in an American Victory.


Wednesday, December 2, 2020

Rebels and Patriots in Mexico


Last week my son David and I had a small Rebels and Patriot game set during the Mexican-American War 1846-1848.

The scenario was a American colon that needed to exit the board to the East (1VP for each unit leaving the board) and a Mexican force to perform an ambush mainly from the South board edge to stop them (1VP for each American unit routed). 

OOB - American (David)

  • 3x Units of Line Infantry (one with the Leaders @ 4 points each
  • 1x Unit of Light Artillery with Limber @ 6 points
  • 1x Unit of Light Cavalry @ 4 points
  • 1x Unit of Skirmishers @ 2 points

OOB - Mexican (Dalauppror)

  • 1x Unit of Heavy Cavalry (with leader) @ 6 points
  • 1x Small unit of  Aggressive Heavy Cavalry @ 6 points
  • 1x Unit of Mounted Skirmishers that are Good Shooters @ 6 points
  • 1x Small Unit of Aggressive Shock Infantry (Dissmounted Heavy Cavalry) @ 6 points

Short recap of the game.

The Mexican was allowed to deploy one unit at the East board edge and the rest at the South, the American deplyed in Colon on the road from the West.

The American started to move along the road as the Mexican Cavalry tried to close in the distance to them... as the Mexican approached the American lined up along the road and opened fire with the Artillery and then the Line Infantry... Devestating result for the Mexican Heavy Cavalry...

It all lokked like an easy win for the American but the Mexican seemed to have extreme morale as they time after time passed Morale checks and continued the fight...

When the smoced cleared the Mexican forces was all routed but they had managed to cause 3 American to rout so it all ended upp in a Draw 3VP vs. 3VP.


Sunday, January 6, 2019

Random charge distances in Rebels and Patriots


First blog post for 2019 will be a in-depth deskription of a rule in the up comming Rebels and Patriots rules that go a bit outside the confortable "rampant" box, random charge move distances.

So what is it all the fuss about and way...

It actually started with all Cavalry was shoot to pieces during the playtest games, Cavalry are and should be fragile to firing as well as Infantry in the open BUT at least the Cavalry should have a chanse to reach a enemy before the unit was all gone, at least for the sake of playability of the rules.


The solution on our chalange was to introduce a longer but random charge move, giving the charging unit a chance to closing in befor they was taken out, but also puting the to a risk of ending up in between if they failed to gain enought momentum in their charge.

When your unit want to charge a enemy unit it has to be within Maximum Attack Distance, 12" for Infantry and 18" for Cavalry.... sorry if i choked you..


So we asume your unit are within Maximum Attack Distance, then you roll to Activate the unit as usual suceeding on a 6+

If you suceeded with the Activation, the unmodified dice roll,is the distance your unit must move forward the target unit of the attack. All Cavalry units add +6" to the dice roll. The attacking unit must move the full distance even if it wont bring it in contact with the target unit, remember to honour the 3" rule for proximity to enemy units if the attack dosent make it in to contact.


With this simple solution a unit have the chanse to be able to perform an charge before taking to many casualties, there is still a greate risk to expose themself to enemy fire.

The enemy also act under the threat of being charged before they can eliminate the threat as they cant really be sure when the enemy will comit to attack, will he chanse to Attack further away with the risk of being caught in between or will he try to play it safe and move in possision to get a shorter Charge distance...


This also effect the triangular metaplay between Infantry, Cavalry and Artillery, as for example Cavalry are now a greater threat to Infantry that in responce form-up in Close Order (better protection from cavalry) but that would make the Infantry more vulnerable to Artillery fire.

Here are an example of the random charge move:

An infantry unit wants to Attack an enemy unit that is 7" from them. The unit rolls 5 on the Activation Test and remains stationary as they failed the test (they need 6+ to Activate). If the Attacking unit had their Officer within 12", giving +1 on all Activation rolls, they would have succeeded with their Activation and moved 5" (the unmodified number rolled on the Activation dice) towards the enemy, but they would not be able to make contact as they started 7" away. Instead, the Attacking unit has to stop 3" from the enemy and no melee will occur. 

If the Attacking unit was a unit of Light Cavalry, they would still fail to activate on the roll of a 5, but with the Officer close by they would have gained their vital +1, totalling 6 and succeeding – thereby moving 5" + 6" (Cavalry add +6"), a total of 11" which would have galloped them into contact with the enemy 7" away. 

If the unit being charged was another Light Cavalry unit that chose, and succeeded, to Evade, it would then make a half move (6" for Light Cavalry) as a response to the Attack. Meaning that the unit would be 13" away from the Attacking unit before the Attacking unit moved. The Attacking unit would only make a move of 11" – not enough to contact the target, so the charging Light Cavalry would stop 3" short.

I hope you will like the new charge concept and that it will give you even more interesting games with the Rebels and Patriots rules.

Below some more pictures from a sucessfull British "charge" :)
all minis painted by my matey jesper.


Saturday, December 8, 2018

Rebels and Patriots AAR


A short Rebels and Patriots AAR from one of the playtest games, Mexican-American War, The Maxican player was to attack a small farm with a few American defenders and some civilians. The main focus for the game was to test out the Chock Infantry.

OOB - Mexicans, 16 points

2 units of Shock Infantry @ 6 points each
2 units of Skirmishers @ 2 points each

OOB - Americans, 8 points + 12 points

1 unit of Light Infantry @ 6 points
1 unit of Skirmishers @ 2 points

American reinforcements

3 units of Line Infantry @ 4 points each


2 units of Mexican Shock infantry lined up for an frontal assault. The order was to seize the hacienda and also if possible capture the civilians.

The American defendes had baricade themselfs with the objective to defend the Hacienda and keep the Civilians safe untill reinforcements could arrive.  


As most units in Rebels and Patriots are fragile to firing, especially at close range (2 Hits are one Casualty)  the Mexican player visely deployed his 2 Skirmish units in front of the Shock Infantry to save them for the final assault of the hacienda.

The American defenders opened up as soon aws the enemy was within range (18"). The Light Infantry does not have the Firs Fire rule so there is no cause to whait to open fire. 

The intense American firing take its toll on the Mexican Skirmishers advancing in fron of the Shock Infantry that forms in to Close Order Formation gaining the benefits of better Disciplin and Fighting and Firing capabilities and as there are no American artillery close by there is prety safe to have a unit in Close Order.

As we allow unit in Close Order to pass through Skirmishers the Shock Infantry can advance as long as possible in cover of their Skirmishers...


Even Shock Infantry in close order may fail a activation from time to time,,,the Mexican Officers unit are draging behind...

As the American Skirmishers decided to leave the Hacienda with the civilians the American reinforcements arrives

The Mexicans have advanced within the Maximum Attack Distance, but they cant be sure to reach their intended target unit with a Attack Action. The Attack distanse in Rebels and Patriots are not set but are determined by the activation roll of the Attack Action.

The American contuniues thir advance but not as fast as the Officer want them to...

The Mexican Shock Infantry tries to Attack the Hacienda, the first unit with the Officer fails to rech the enemy as they was to far away and are now in a bad spot for enemy fire. BUt the second Mexican Shock Infantry unit that are closer succeed to reach the haciensa...

...a intence fight take place but even if the Light Infantry har the benefit of hard cover by the Hacienda the firece Mexican Shock Infantry manage to dislodge the American Defender and occupie the Hacienda.

With the Mexicans in possession of the Hacienda the American Officer eads a Do or Die charge against the mexican Shock Infantry, but all in wain as Shock Infantry in hard cover indeed are a tought nut to crack...

The Americans tried a second time, also unsucessfull, before the game ended.

That was all for this time, hope yoy had a good read and that you all will have a great weekend!


You can see Wargames Illustrateds Flipthrough film at youtube: