


During saturday I had the chanse to properly try out Dux Bellorum, untill now it´s only been small tryouts at the kitchen table.
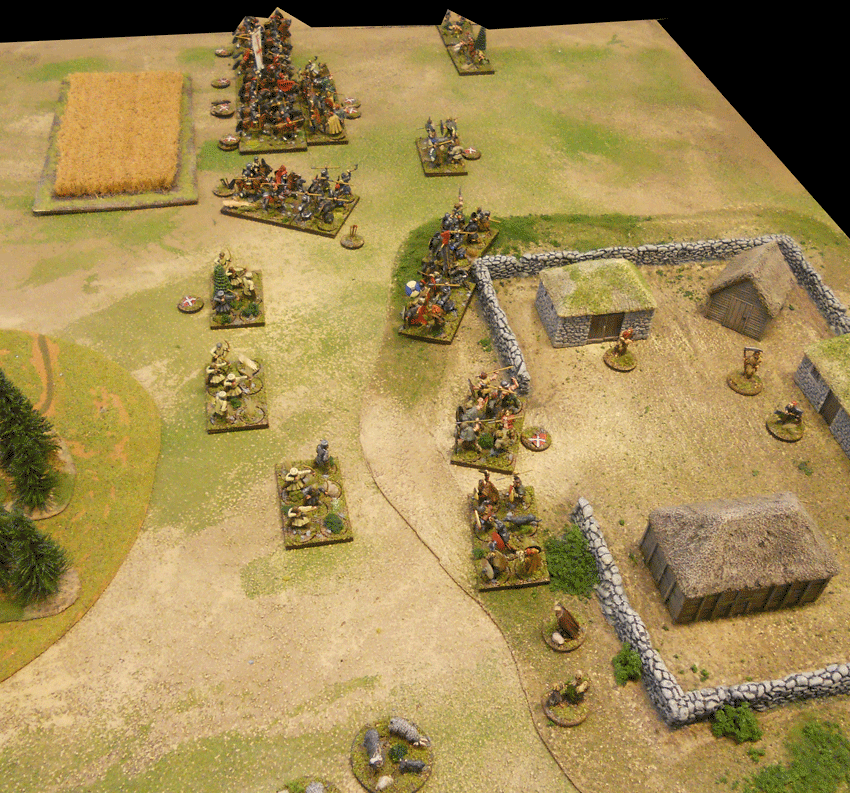
We used my 28mm minis on movement trays giving us a base width of 80mm, and was playing at a 120x120cm table... think we should have used the full 180x120cm as it got a little to narrow.
The forces was of the standard 32 points, one Romano-British Land Raiding warband and one Saxon Warrior warband.
OOB
Romano-British Land Raiders
1x Mounted Companions w. Leader @5pts
4x Mounted Nobles @5pts each
3x Foot Skirmishers w. Bows @1pts each
8x Leadership Points @4pts
Total: 32 pts
Saxon Warriors
1x Foot Companions w. Leader @5pts
2x Foot Noble Warriors @5pts each
5x Foot Warriors @3pts each
2x Foot Skirmishers w. Slings @1pts each
6x Leadership Points for Free:)
Total: 32 pts
I played the Romano-British and was agressor, my friend Jonas commanded the Saxons and was obvious then repellor. I have made some comments about how the rules work in to the AAR as well as this is a new set of rules.
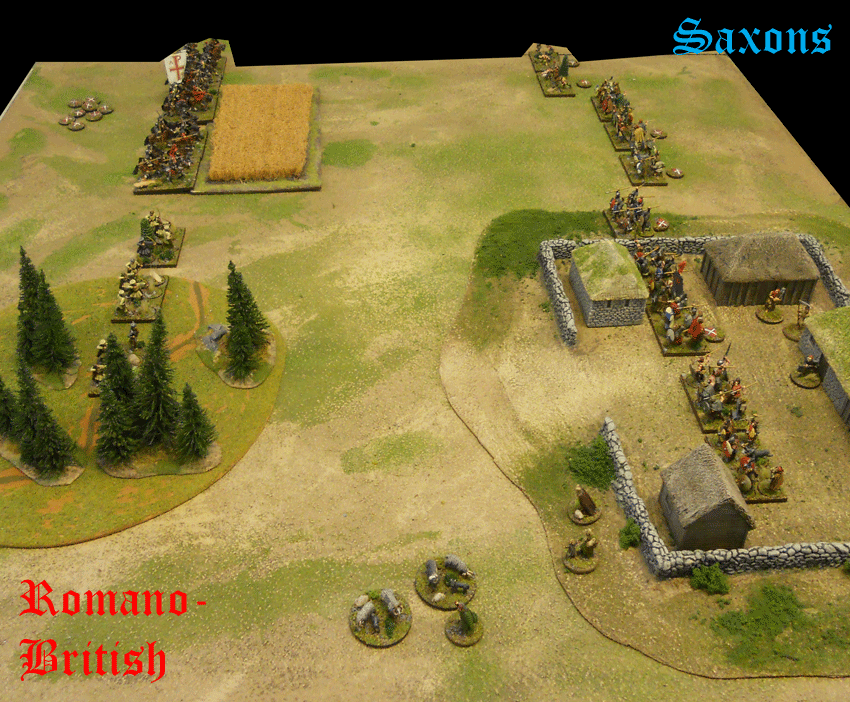
The Set-up, the defending Saxons placed half he´s warband in the village and the other half out in the open...
The British plan was to use the cavalry to annihilate all the Saxons in the open and win the day and in the same time use the 3 units of Skirmish archers to delay the Saxons in the village... nothing could go wrong...
The set-up alternate, all steps begin with the agressor. First all Foot from borht sides, then the Cavalry and last all Skrimishers.

The Saxons in the open started to make a uneven advance, the ones in the village seems to like the good food so they shoose to stay for a while longer...
The British skirmishes advanced out of the forest to start harassing the Saxons hiding in the village... at the same time the British cavalry started to make way through the filed in there way...took some time...
Each turn start with one of the key elements of the rules, the placements of Leadership Points (LP´s) these points, right placed, will give your units benefits during the turn. As they are placed alternated starting with the repeller, this stage are like a game in the game, not giving away ones plan to obvious...
We used my red shield markers as LP´s and as you can see I at a start shoose to sprinkel them allower my British warband...
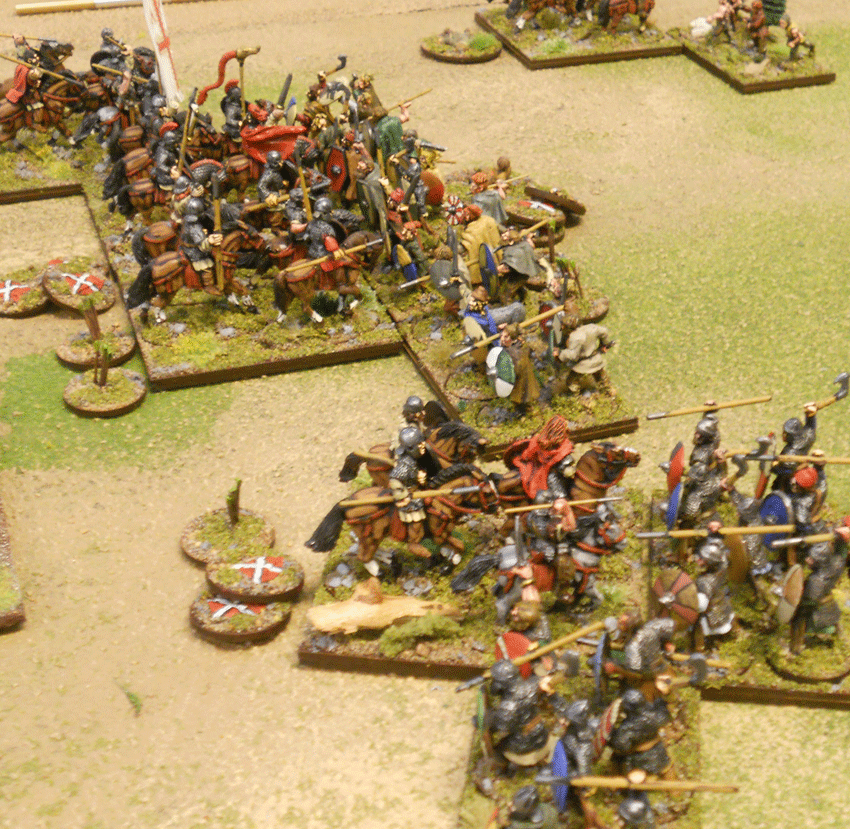
After some doubt the Saxons left the village durinng constant harassment of the British skirmishers... On the Brisish cavalry flank they at last managed to get through the filed and charged in to the poor Saxon warriors...
The movement are also alternated starting with Skirmishers then Cavalry and last Foot, each of the movement sequences starts with the agressor.

A fierce battle commence, surprisengly the Saxon warriors stod there ground several turns...
By good use of the LP´s both sides minimised their casultys and ther would be a long and hard fought combat. The single combat one unit against one are quite stright forward. But then you start to fight out the linked combat with several units there can be some problem and confusion about how hit how etc, but I think it will cleare then we get some more games.
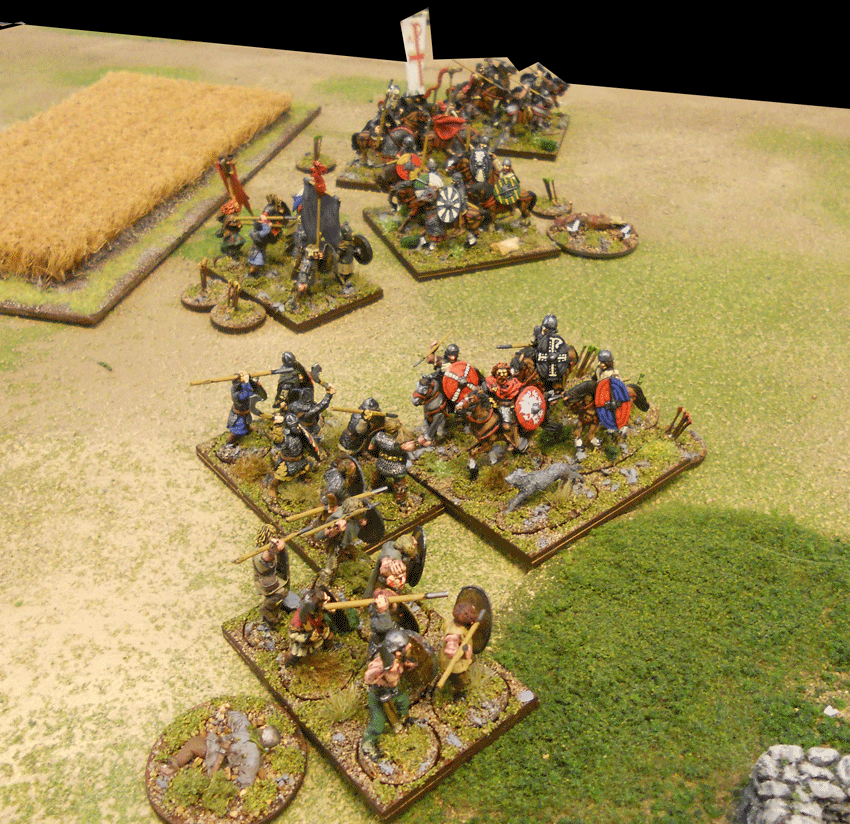
Over at the village the Saxons had slaughtered the British skirmishers due to poor command by the british warlord...
Now the situation for the British Cavalry started to get stressed as more and more Saxon closed in... at least one British Cavalry unit managed to exploit the left flank and ride down the Saxon Slinger:)
The British and The Saxon Skrimishers was both taken care of as they didn´t manage to evade due to lack of LP´s.... LP´s give you the opportunety to move before your opponent, but if you don´t have any LP´s allocated to the unit then you are f... we might have missed some rule here, but I don´t think so...
Due to loss of units you start to lose LP´s to and it gets harder and harder to get the real edge in the combat situations.
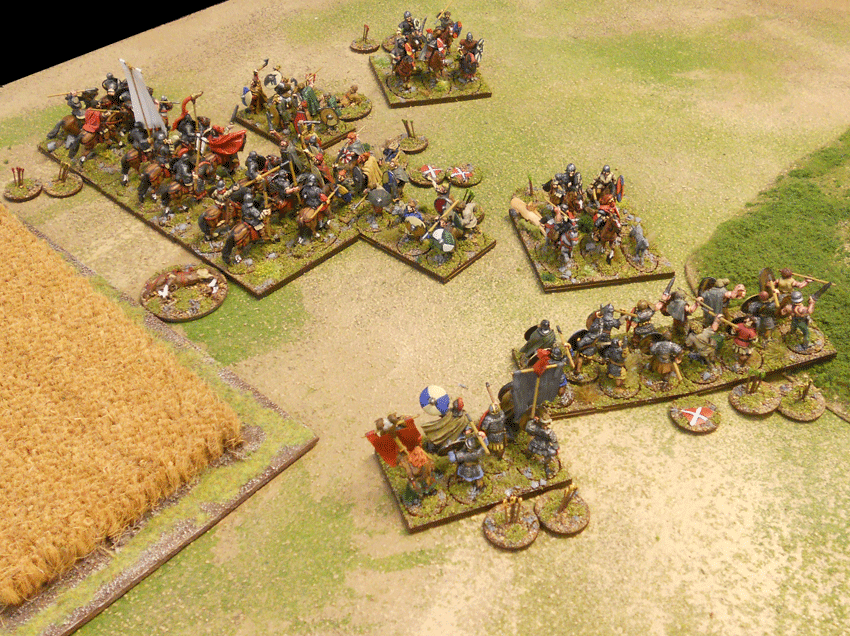
Chaotic situation... as more and more Saxon warrior closed from the village in to join the fight, but the British some how managed to meet up with a singel unit of cavalry and at the same time make a last puch against the broken-down Saxons in the open...
We used the small arrow markers (1 loss) and dead horses (3 loss) to mark cohesion loss...got a little to much markers from time to time with both the LP´s and the Cohesionloss makrers on the table.
Finaly the Saxons in the open breakes and are vipedout by the British Cavalry, the harsh reatment of there fellows was like a shock wave through out the Saxons llines and severl more Saxon units lost there will to fight on...
It was a victorius day for the British with lots of plunder in the vilage:)
Then a warband have lost more than 50% of it´s units (not counting Skirmishers) each remaning unit have to test for Bravery or flee the field of battle...
As this was the first real test of the rules there ofcourse was several rules that we missed, but it was still a realy enjoyable game. The rules have more to explore and I realy like the ideea of that I won´t need to puchase lots of suplements but all I need are in one book to a realy decent cost.
More info about the Dux Bellorum rules and a runthrough of a game turn can you find at Dan Merseys blog.
That's one super looking board and very nice break down of the rules. Looking forward to getting my copy!
ReplyDeleteChristopher
This comment has been removed by the author.
ReplyDeleteThanks Christopher !!!
ReplyDeleteI hope you get your copy soon!
Best regards Michael
Great batrep and board. Looking forward to seeing more reports in the future.
ReplyDeleteCheers
Ross
Great AAR! Despite me losing I had blast playing and am looking forward to more games of Dux Bellorum (my copy came in the mail today by the way).
ReplyDeleteFor some reason I thought that my objective was to defend the village, and so I deployed my best troops there ...
Great pics! Thanks for the rep, I'm hearing nothing bad about the two Dux at the moment.
ReplyDeleteGreat write up, thanks.
ReplyDeleteLooking forward to giving these rules a go soon.
Tom
Another great AAR, with beautiful photos! Really impressive!
ReplyDeleteBeautiful report and great to hear about a new set of rules!
ReplyDeleteGreat AAR, and love the terrain.
ReplyDeleteRegards
Hobbyworker.
Fantastic looking game Michael! Excellent photos.
ReplyDeleteGreat report :-)
ReplyDeleteJason.
A great AAR. I like a lot the game, it appears to be very interesting. I have my own PDF of the rulebook so, now, to read it.
ReplyDeleteAbout the units, every base is a unit?
Thanks mates! Glad you like the AAR I hope every one of you get a chanse to tryout both the Duxes.
ReplyDelete@Juan, every base was a unit in this AAR, looking forward to see your first AAR with your late romans.
Best regards Michael
A jolly good ARR Dalauppror!
ReplyDeleteThanks for the report, it looks like a pretty cool game, how long did it take you to play?
ReplyDeleteSteve
Thanks !
ReplyDelete@Steve, might ave taken 90 minutes, but 1/3 of that time was rules checking:)